Monday, August 22, 2016

Unattended installation octopus server - PowerShell DSC


I’ve been using Octopus deploy at work, and created a custom DSC resource to do the installation and configuration. The resource is now available to use from PowerShell gallery. You can use the Install-Module cmdlet to download the DSC resource

Install-Module Octopus

This will install the Octopus module. The module has a DSC resource OctopusServer that can be used for installation and configuring the octopus server on a node. You can create a simple configuration as below.

Configuration OctopusServerConfiguration{
    param(
        [PSCredential] $credentials
    )
    Node localhost{
        OctopusServer OctoServer{
            ServerName = $env:COMPUTERNAME
            Port = 8085
            Credentials = $credentials
            Ensure = "Present"
        }
    }

}


Monday, August 15, 2016

Combining DSC with ELK for effective infrastructure monitoring

DSC and event logs

DSC the management platform in Windows PowerShell that enables deploying and managing configuration data for software services and managing the environment in which these services run.
DSC provides a set of Windows PowerShell language extensions, new Windows PowerShell cmdlets, and resources that you can use to declaratively specify how you want your software environment to be configured. It also provides a means to maintain and manage existing configurations. When you run a DSC configured resource on a target system it will first check if the target matches the configured resource. If it doesn’t match it, it will make it so.

But if there is an error in the last DSC run? How can we have live monitoring and alerting with DSC? We’ll that’s what we’ll be solving in this post. We’ll use the combination of event logs and the ELK stack to create an infrastructure monitoring system, for our environments. DSC logs every details of the execution and details in the windows event logs. These logs can be found by using the EventViewer, by navigating to the channel Applications and Service Logs -> Microsoft -> Windows -> Desired State Configuration


We’ll use the WinlogBeat in combination with Logstash to retrieve these logs and push them to Elastic search instance. Later using Kibana we can create queries and visualizations to create a DSC dashboard for effective monitoring.

Installing and configuring ELK on Windows

Before staring the installation, we need to download the following software:

Download and extract all these softwares to the respective folders under a folder “ELK”. The contents in the demo looks like. I have some additional beats installed on my machine, but for this demo, we only need Winlogbeat. Before starting the installation, we need to have JAVA installed on the machine for Elastic search.

To install ELK, we need to start the services for elastic search, logstash and kibana. These services can be started by running the .bat files for these services.

Elasticsearch

To install and configure elastic search, navigate to the bin directory of elasticsearch and run the service.bat file with argument “install”


Once the installation is completed you can test whether everything is working fine by invoking the url http://127.0.0.1:9200/ . If everything is correctly setup you should see a JSON result  like

{
  "name" : "Rebel",
  "cluster_name" : "elasticsearch",
  "version" : {
    "number" : "2.3.1",
    "build_hash" : "bd980929010aef404e7cb0843e61d0665269fc39",
    "build_timestamp" : "2016-04-04T12:25:05Z",
    "build_snapshot" : false,
    "lucene_version" : "5.5.0"
  },
  "tagline" : "You Know, for Search"
}

Logstash

We will make use of the winlogbeat plugin to send events to logstash. On receiving these events, logstash will send the transaction to elasticsearch by using the output plugin.

To install the beats input plugin. Run the logstash-plugin.bat file with the argument “install logstash-input-beats”.


The next step is to configure logstash to listen on port 5044 for incoming beats connection and index into elasticsearch. You can do this by using a logstash configuration file. Create a logstash.conf file in the logstash/bin directory with the below contents.

input {
  beats {
    port => 5044
  }
}

output {
  elasticsearch {
    hosts => "127.0.0.1:9200"
    manage_template => false
    index => "%{[@metadata][beat]}-%{+YYYY.MM.dd}"
    document_type => "%{[@metadata][type]}"
  }
}

Now you can start the logstash service with the configuration by passing this file name to the logstash.bat file.

.\logstash.bat -f logstash.conf

Winlogbeat

To send the DSC event logs to logstash, we need to configure winlogbeats to pull log information from the DSC operational channel. To do this, open the winlogbeat.yml file in the winlogbeats directory and add the lines for event_logs as given below.


Change the output to logstash instead of the default elasticsearch option.

Install the service by running the install-service-winlogbeat.ps1 script in the same directory.

kibana

Run the Kibana.bat file in the bin directory under kibana folder, to install the service. If the service is stared, kibana site can be accessed at the url http://127.0.0.1:5601.  

You can configure the winlog index pattern by creating a new index pattern winlogbeat-* as given below. 

Once the index is created, you can now go ahead and create queries and visualizations from those queries for your DSC dashboard.

For ex:

You can create a visualization for the logs per computer by following the steps below.
  • Click on the discover tab and create a query with fields computer name and log level. You can do this by adding the computer_name and level fields as given below.

  • On the right side, you should be able to see the filtered results with the column names now.
  • Next, save the search, by choosing the save search option in the top bar and give an appropriate name

  • Next, click on the visualize tab and add a new line chart, choose the select from saved search as a source and choose the search you have saved.

  • Click on x-axis and choose “Date histogram” for aggregation field.

  • Click on Add sub buckets, click on split lines and choose “Terms” as sub-aggregation with field “computer_name”

  • Click the play button to see the graph. Save the visualization with a proper name.
  • Now click on the dashboard and add this visualization on the dashboard to see the widget in action.


Thursday, August 4, 2016

Application deployments, best practices


With more and more teams getting ready with practices like continuous deployment and DevOps, there are lot of questions about the best practices regarding application deployment. I've been working with projects and setting up continuous delivery and automated deployments as part of the work. Below are some of the practices that I follow for application deployments.
Automate
There is a lot of focus on automation nowadays and a lot of tools and information is available to automate the manual actions in the deployment process. Almost every deployment automation tools allows complete customization and extensibility to make use of scripting languages that are used to carry out OS specific tasks. This makes it very easy to use these tools in the process even though you have a specific task to perform that is not available out-of-the-box in the tool that you are using. For .NET applications you can use PowerShell for example to do almost anything on windows environments.
Build once, deploy it many times
For avoiding situations like, "it works in the Test environment but not in Production". you need to use the same binaries that were installed and tested on lower environments when deploying to higher environments. For automated deployments to go risk free, we need to have the confidence that we are deploying the same package that was tested and approved from a lower environment. If you are planning to recompile the code base every time a deployment is happening, there are lot of hidden changes and troubles coming along with that process, which makes the deployments unstable.
Maintain a repository for the build artifacts
Things can sometimes go wrong and sometimes its needed to roll-back to a known-working version. Having an artifact repository for your packages not only will help you in using the same version on every environment, but also to locate old versions of an application without having to build them again. Also its a stable version that was working before!!!
Change configuration variables at deployment time not at build time
One of the common challenges with applications which migrate through the usual lifecycle of environments such as development, test and production is getting the configuration context right. Some of the most common examples are connection strings, trace modes etc. There are multiple ways to handle this problem with one of them being making use of configuration file transformations as part of the build process. This can introduce the same risk as rebuilding binaries for each environment. It’s a good practice to make use of the deployment tool to apply environment specific configuration changes during deployment time to the applications. This will allow you to be flexible with the latest changes in the environments.
Don’t customize the deployment process or steps based on environments
It’s always good to treat your deployment process the same across environments. This helps you to create more reliable and predictable deployments across environments. A lot can go wrong when you try to make adjustments in the deployment process based on environments. Let’s keep it simple J

Wednesday, July 27, 2016

Test driven infrastructure using Pester and PowerShell DSC

In software development world, test driven development (TDD) is a well-recognized practice that the teams use to improve software quality and design. Apart from having a clean and maintainable code base, the team also benefits from a suite of automated tests, that are executed as part of the continuous integration process used for providing faster feedback cycles. Similar benefits can be gained in infrastructure projects when infrastructure is treated as code driven by tests.

Test driven infrastructure is a practice employed by highly efficient DevOps teams working on infrastructure automation using configuration management tools such as PowerShell DSC, Chef etc. to develop their infrastructure in code and provide a complete support to introduce and run tests. This can allow development and operations teams to collaborate and confidently deliver working infrastructure code.

If you are working in a team that uses PowerShell DSC for configuration management and involve in creating and using DSC resources, you should also start writing both unit and integration tests for your resources and configurations. In this post I’ll explain a scenario where we create a custom DSC resource (to install modules from PowerShell repository) and later use that in a configuration to install the required modules in our infrastructure. As the focus point is more on testing, we’ll not be looking into the details of DSC and how we can create custom resource etc. You can read about PowerShell DSC for more details here (https://msdn.microsoft.com/en-us/powershell/dsc/overview ). Also I’ll be using Pester (https://github.com/pester/Pester/wiki/Pester) for creating BDD style tests for our configurations.

Pester is a BDD based test runner for PowerShell.
Pester provides a framework for running Unit Tests to execute and validate PowerShell commands. Pester follows a file naming convention for naming tests to be discovered by pester at test time and a simple set of functions that expose a Testing DSL for isolating, running, evaluating and reporting the results of PowerShell commands. Pester tests can execute any command or script that is accessible to a pester test file. This can include functions, Cmdlets, Modules and scripts. Pester can be run in ad hoc style in a console or it can be integrated into the Build scripts of a Continuous Integration system.”

Creating a Pester test for our custom DSC resource.

Let’s directly jump into some code that we will be testing. Below is the DSC resource that I have created for installing modules using the cmdlets available in the PowerShellGet module.


function Get-TargetResource
{
    [CmdletBinding()]
    [OutputType([System.Collections.Hashtable])]
    param
    (
        [parameter(Mandatory = $true)]
        [System.String]
        $Module
    )
           $moduleDetails = Get-Module -Name $Module -ListAvailable -ErrorAction SilentlyContinue
    $present = $moduleDetails -ne $null
    $presentValue = 'Absent'
    if($present){
        $presentValue = 'Present'
    }
    $returnValue = @{
        Module = $moduleDetails | Select -expand Name
        Version = $module | Select Version -ErrorAction SilentlyContinue | Format-Table -HideTableHeaders -ErrorAction SilentlyContinue | Out-String -ErrorAction SilentlyContinue
        Ensure = $presentValue
    }
       return $returnValue
}


function Set-TargetResource
{
    [CmdletBinding()]
    param
    (
        [parameter(Mandatory = $true)]
        [System.String]
        $Module,

        [System.String]
        $Version,

        [ValidateSet("Present","Absent")]
        [System.String]
        $Ensure
    )

    $present = $ensure -eq 'Present'
    if($present){
        if([string]::IsNullOrWhiteSpace($Version)){
            "Installing module $Module" | Write-Verbose
            Install-Module -Name $Module -Force -Verbose
        }
        else{
            "Installing module $Module with version $Version" | Write-Verbose
            Install-Module -Name $Module -RequiredVersion $Version -Force -Verbose
        }
    }
    else {
        if([string]::IsNullOrWhiteSpace($Version)){
            "Uninstalling module $Module" | Write-Verbose
            Uninstall-Module -Name $Module -Force -AllVersions
        }
        else{
            "Uninstalling module $module with version $Version" | Write-Verbose
            Uninstall-Module -Name $Module -Force -RequiredVersion $Version
        }
    }
}


function Test-TargetResource
{
    [CmdletBinding()]
    [OutputType([System.Boolean])]
    param
    (
        [parameter(Mandatory = $true)]
        [System.String]
        $Module,

        [System.String]
        $Version,

        [ValidateSet("Present","Absent")]
        [System.String]
        $Ensure
    )
   
    $result = (Get-Module -ListAvailable -Name $Module -ErrorAction SilentlyContinue -WarningAction SilentlyContinue) -ne $null
    $present = $Ensure -eq 'Present'
    if($result){
        if($present){
            "The module $Module already exists. No action needed" | Write-Verbose
            return $true
        }
        else {
            "The module $Module exist. This will be removed" | Write-Verbose
            return $false
        }
    }
    else{
        if($present){
            "The module $Module does not exist. This will be installed" | Write-Verbose
            return $false
        }
        else{
            "The module $Module does not exist. No action needed" | Write-Verbose
            return $true
        }
    }
}

Export-ModuleMember -Function *-TargetResource


We have 3 functions in the module to test. My goal is to create some unit tests to ensure that the Get-TargetResource, Set-TargetResource and Test-TargetResource methods work as expected.

Test 1:

Our first test is to check whether the Test-TargetResource method returns a true if the Get-Module cmdlet finds a module that is passed as parameter in the system. Remember we don’t need to actually install the module in the system to test this scenario. I’ll be using the Mocking feature of Pester to mock the Get-Module command and use those results to test my method under test.

For Pester to test the functions in the module, we need to allow Pester to launch the module. We can do that by copying the contents of the module to a test script file and dot sourcing the file in the test code. The next important step is to mock the cmdlets that we don’t want to be invoked from the test script. In this case the Export-ModuleMember and the Get-Module commands.


$currentFolder = Split-Path -Parent -Path $MyInvocation.MyCommand.Definition

$Module = 'xPSPackage'
$DSCResource = 'xPSModule'
#Replace this with the folder location of your module
$moduleFolder = "$currentFolder\..\..\Resources\$Module"

Describe "$DSCResource Test-TargetResource"{

    Copy-Item "$moduleFolder\DSCResources\$DSCResource\$DSCResource.psm1" TestDrive:\script.ps1 -Force
    Mock Get-Module { return "$Module" }
    Mock Export-ModuleMember {return $true}

    . "TestDrive:\script.ps1"
   
    Context "CChoco module is installed and Ensure is passed as Present"{
        It "Should return true"{
            Test-TargetResource -Module "CChoco" -Ensure "Present" | Should Be $True
        }
    }
}

We can try to execute the test and see the results. In the command prompt type Invoke-Pester


Test 2:

After the Test-TargetResource, the next step is to test a more complex scenario like the Set-TargetResource. Here we have multiple conditions to test like.
  • .     Installing a module without mentioning a version
  • .     Installing a module with a specific version
  • .     Uninstall an existing module

We’ll use the same test file and add another “Describe” block for testing the Set-TargetResource function. We’ll also be mocking the Install-Module and Uninstall-Module commands from the PowerShellGet module but we’ll be using verifiable mocks to ensure that these commands when called were called with the right parameters and values.


Describe "$DSCResource Set-TargetResource"{

    Copy-Item "$moduleFolder\DSCResources\$DSCResource\$DSCResource.psm1" TestDrive:\script.ps1 -Force
    Mock Export-ModuleMember {return $true}

    . "TestDrive:\script.ps1"

    Context "Ensure is passed as Present"{
        Mock Install-Module -Verifiable
        It "Should call install module"{
            Set-TargetResource -Module "CChoco" -Ensure 'Present'
            Assert-VerifiableMocks
        }
    }
    Context "Ensure is passed as Present and Version as 2.0.0"{
        Mock Install-Module -Verifiable -ParameterFilter {
            $Version -eq '2.0.0'
        }
        It "Should call install module with version 2.0.0"{
            Set-TargetResource -Module "CChoco" -Ensure 'Present' -Version '2.0.0'
            Assert-VerifiableMocks
        }
    }
    Context "Ensure is passed as Absent"{       
        Mock Uninstall-Module -Verifiable
        It "Should call Remove module"{
            Set-TargetResource -Module "CChoco" -Ensure 'Absent'
            Assert-VerifiableMocks
        }
    }
}

The code looks similar to the one before, except for the Assert-VerifiableMocks call. You can execute the tests again by using the Invoke-Pester command.


Creating Pester tests for testing the configuration.

Now it’s time to use the custom DSC resource in a configuration and run it against a node. After executing the configuration we would like to test whether the node is now in the desired state or not. Before executing these tests, we need to create a configuration that uses the xPSModule we created and apply the configuration on the target 
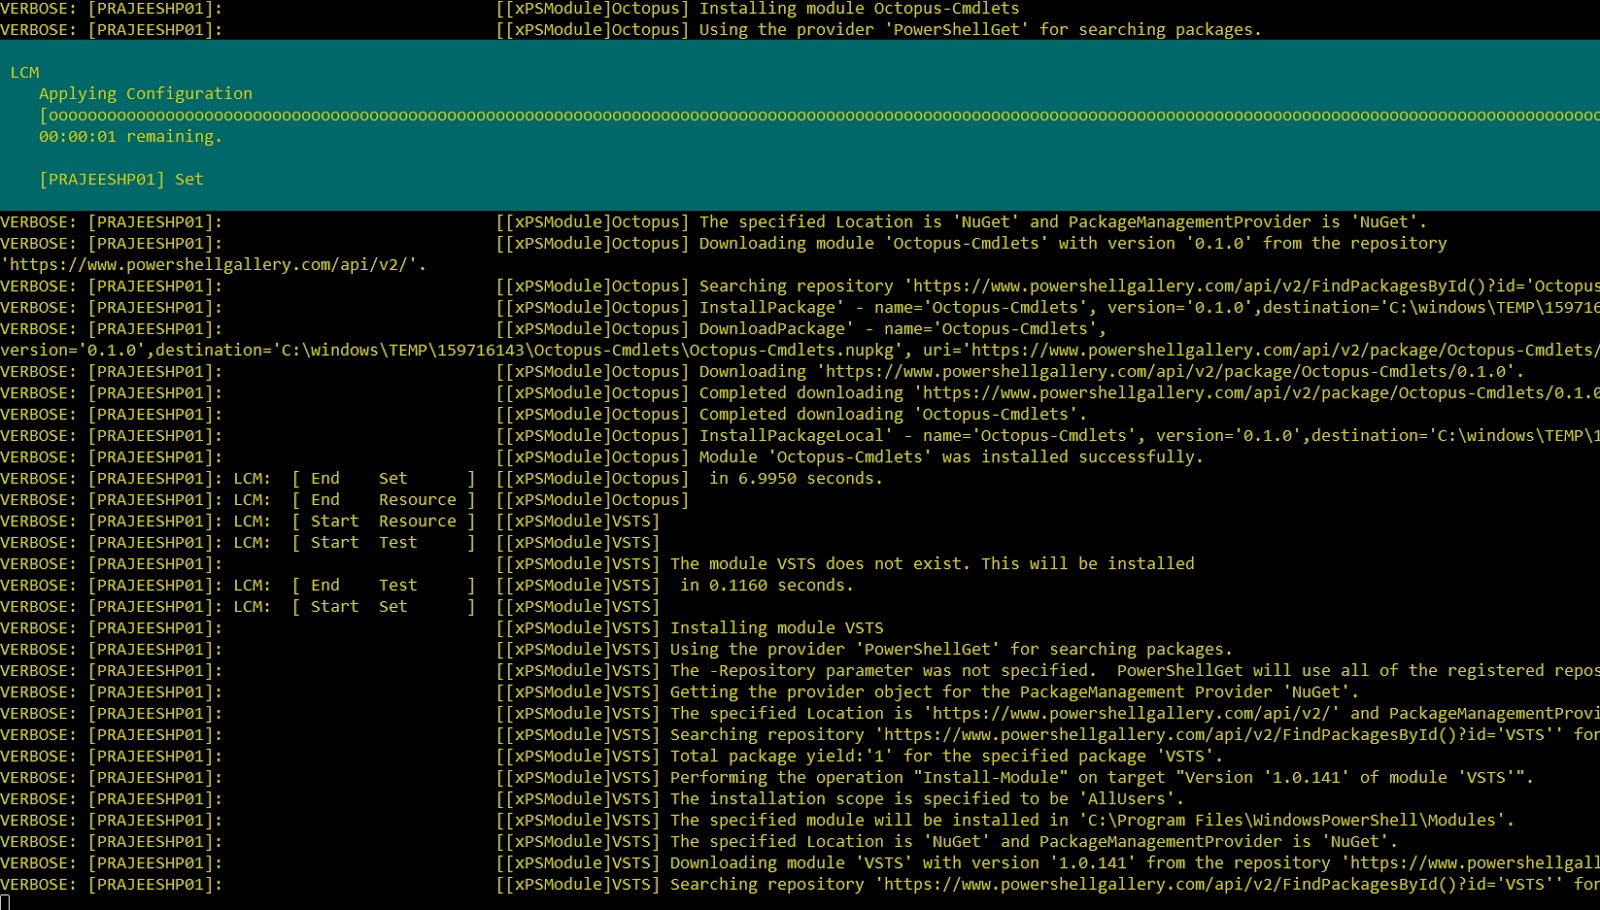
node. I’ve create a sample configuration that will install 3 modules (cChoco, Octopus-Cmdlets and VSTS) on the machine. Later we’ll apply this configuration and create some tests to verify the state of the node after applying the configuration.

Configuration PSModuleConfiguration{
    Import-DSCResource -Module xPSPackage
    Node 'localhost'{
        xPSModule Chocolatey{
            Module = 'cChoco'
            Ensure = 'Present'
        }
        xPSModule Octopus{
            Module = 'Octopus-Cmdlets'
            Ensure = 'Present'
        }
        xPSModule VSTS{
            Module = 'VSTS'
            Ensure = 'Present'
        }
    }
}

PSModuleConfiguration
Start-DSCConfiguration .\PSModuleConfiguration -Wait -Verbose

Now we can create some tests to verify the configuration. I’ve created different folders for my unit and integration tests. In the integration test folder add a new script file and copy the contents below to the script file.

Describe "Installation of modules from PowerShellGet"{
    Context "PSModuleConfiguration is applied on the system"{
        It "Should have installed CChoco module"{
            Get-Module -Name "cChoco" -ListAvailable | Should Not BeNullOrEmpty
        }
        It "Should have installed Octopus cmdlets module"{
            Get-Module -Name "Octopus-Cmdlets" -ListAvailable | Should Not BeNullOrEmpty
        }
        It "Should have installed VSTS module"{
            Get-Module -Name "VSTS" -ListAvailable | Should Not BeNullOrEmpty
        }
    }
}

We are expecting the configuration to be applied on the node, before executing these tests. In the test, we are later asserting whether the modules that were installed as part of the configuration are available in the node. Use the Invoke-Pester command to execute the tests and verify the results.